
Can You Paint Brick? Pros, Cons, and Long-Term Maintenance
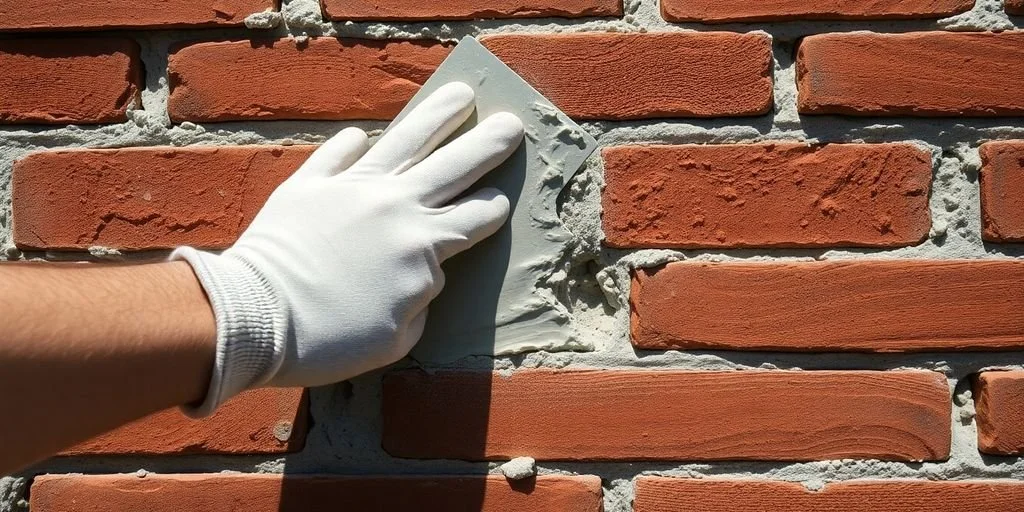
Painting brick can refresh a property, but it is a lasting change that depends on the masonry’s condition and the coating’s ability to manage moisture.
Paint can modernize dated or visually inconsistent brick.
Sound, clean, dry masonry is the best candidate for painting.
Moisture trapped behind an unsuitable coating can accelerate deterioration.
Mortar repairs and water-entry corrections should come before cosmetic work.
Painted brick needs regular inspection, cleaning, touch-ups, and eventual repainting.
When painting brick makes sense
Brick can be painted, but the decision is not simply about choosing a color. The masonry must be able to accept a coating without creating a moisture problem, and the surface should be stable before any cosmetic change begins. The right approach also differs between an indoor accent wall and an exposed exterior elevation. Climate, brick type, mortar condition, and previous coatings all deserve attention.
Exterior versus interior brick considerations
Interior brick is generally easier to evaluate because it is less exposed to rain, snow, and repeated freeze-thaw movement. A Fireplace Surround, Accent Wall, or finished basement may be a reasonable painting project if the brick is dry and free of active damage. Exterior brick has a more demanding job: it sheds water, releases vapor, and moves slightly as temperatures change. A coating that looks fine indoors may fail prematurely outside if it blocks drying or was applied over damp masonry.
Before painting an exterior wall, consider how water reaches the brick from the roof, windows, coping, grade, and nearby landscaping. Capital Masonry Restoration discusses masonry restoration and repair in relation to Minnesota’s freeze-thaw cycles and moisture intrusion, two concerns that should be part of any exterior assessment.
Situations where paint can improve appearance and protection
Paint may make sense when the brick is structurally sound but visually tired, mismatched, or difficult to coordinate with the rest of the property. It can unify additions, soften overly varied brick tones, and provide a controlled finish when the existing color no longer suits the architecture. It can also add a modest surface barrier against weather, although paint is not a substitute for sound flashing, intact mortar, or proper drainage.
The most successful projects begin with a clear reason for painting rather than an assumption that paint will solve every masonry issue. If the goal is only to brighten the surface, limewashing or whitewashing may create a more forgiving change than a film-forming coating.
Brick types and surfaces that may not be suitable for painting
Old, soft, or highly porous brick can be vulnerable when a coating limits evaporation. Newly installed brick may also need time to dry and stabilize before it is painted. Surfaces with active efflorescence, crumbling faces, loose units, oil, heavy soot, or an unknown coating history need investigation first. Painting over those conditions can turn a visible warning into a concealed one.
Historic Masonry Deserves Extra care because its brick and mortar may have been designed to move and breathe differently from modern materials. A test patch in an inconspicuous location can reveal adhesion and appearance issues, but it does not replace a full condition assessment.
How local climate affects the decision
Minnesota’s winter moisture and freeze-thaw cycles make exterior coating decisions less forgiving. Water that enters a crack or porous joint can expand as it freezes, while a slow-drying wall may remain vulnerable beneath the paint. Seasonal timing matters as well; the surface, air, and repair materials need suitable conditions for cleaning, painting, and curing.
A local review can help identify whether the proposed coating is compatible with the wall and the timing of the work. Climate-aware planning is especially useful on shaded elevations, chimneys, parapets, and walls near snow accumulation.
The benefits of painting brick
When the masonry is suitable, paint can produce a strong visual transformation with relatively little alteration to the brick’s shape or layout. It is especially useful when the existing color dominates the architecture or when several masonry batches do not match. The benefit is mainly aesthetic, with some limited weather resistance when the coating and preparation are appropriate. Those advantages should be weighed against the maintenance commitment that follows.
Updating outdated or mismatched masonry
A coat of paint can bring older brick into the same visual language as newer siding, trim, doors, or additions. It may also make a renovation feel intentional when an extension uses brick that does not closely match the original wall. This is a design choice, though, not a way to erase structural differences. Joints, cracks, and uneven surfaces remain important even after the color changes.
For outdoor projects, it helps to consider the full setting, including Outdoor Patios and Spaces in Minnesota when that area’s paving, walls, or surrounding finishes affect the overall color plan. The brick should look connected to the property rather than isolated from it.
Creating a more uniform, customizable finish
Paint offers more control than the natural variation of fired brick. Homeowners can choose a muted neutral, a crisp light tone, or a deeper color that works with the roof and landscape. It can also reduce the visual distraction of mixed repairs and uneven coloration, although the underlying texture will still show through.
That uniformity comes with a tradeoff: the surface becomes dependent on the coating for its appearance. A good color decision should account for sun exposure, nearby materials, dirt visibility, and the difficulty of matching the shade later.
Improving curb appeal and perceived property value
A well-maintained painted brick façade can make a property appear cleaner, more current, and better coordinated. Buyers may respond positively to a finished exterior, but paint alone does not establish masonry quality. Cracks, dampness, failing joints, or a neglected chimney can quickly outweigh a fresh color.
The best curb-appeal improvement is therefore the combination of sound repairs and restrained design. A carefully prepared wall generally looks more convincing than one that has simply been covered quickly.
Adding limited protection against weather exposure
A suitable masonry coating can reduce direct wetting of the surface and provide some resistance to wind-driven rain. That protection is limited and depends on intact joints, sound brick, proper detailing, and adequate drying capacity. Paint cannot correct water entering from a failed flashing detail or an open crack.
Think of coating as one layer in a maintenance plan. It should support the wall’s performance, not carry the entire burden of keeping water out.
The drawbacks and risks of painted brick
Paint changes the way brick interacts with water and vapor, so the risks deserve as much attention as the visual benefits. A coating can fail because of poor preparation, incompatible materials, damp conditions, or movement in the wall. Removal is often laborious, and damage hidden beneath the finish may go unnoticed for years. A realistic maintenance plan should be part of the decision before the first coat is applied.
Reduced breathability and trapped moisture
Brick and mortar are porous materials. They can absorb some moisture and release it through evaporation, but a dense coating may slow that process. If water enters through a crack, joint, roof edge, or window detail, it may remain behind the paint and contribute to blistering, spalling, or mortar deterioration.
This does not mean every painted brick wall will fail. It means the coating must be selected for masonry and the source of moisture must be addressed first. Moisture management comes first whenever an exterior wall is being considered.
Peeling, flaking, and efflorescence
Peeling paint often signals weak adhesion, movement, dampness, contamination, or a previous coating that was not properly prepared. White, powdery efflorescence can appear when water carries soluble salts to the surface. Scraping and repainting may improve the appearance temporarily, but recurring deposits usually call for a closer look at how water is moving through the wall.
Paint failure can spread in stages, beginning as small bubbles or hairline cracks and becoming broad flakes. Early inspection gives the owner more options than waiting until large areas have detached.
Difficulty and cost of future paint removal
Once brick is painted, returning to an uncoated appearance can be difficult. Removing the coating without damaging the brick may require careful testing, specialized methods, and substantial labor. Aggressive abrasive cleaning can erode the brick face or alter its texture, while chemical methods need controlled handling and thorough rinsing.
For that reason, painting should be treated as a long-term finish rather than a temporary experiment. A small test area and a documented record of the coating system can make future maintenance less uncertain.
How paint can conceal developing masonry damage
A uniform surface can hide hairline cracks, open joints, staining, and early spalling. Those defects may continue to develop behind the coating, especially when water is entering from above or from the back of the wall. Routine inspection should include the mortar lines, corners, sills, parapets, and areas where the paint has changed texture.
A painted wall still needs the same attention as unpainted masonry. The color should never become a reason to postpone investigating movement, dampness, or loose brick.
How to determine whether brick is ready for paint
Readiness is a condition question, not a calendar question. The wall should be stable, clean, dry, and free from unresolved sources of water. A careful review also considers the mortar’s age and softness, the presence of earlier coatings, and the type of brick involved. If the answers are uncertain, a masonry professional can help separate a suitable painting project from a repair project that only looks cosmetic.
Inspecting for cracks, spalling, dampness, and loose mortar
Walk the wall in good light and look closely at both the brick faces and the joints. Cracked Bricks, flaking faces, hollow-sounding areas, damp patches, and loose mortar all deserve attention before painting. Check around windows, doors, roof intersections, chimneys, and the base of the wall because these locations often reveal water or movement first.
A short inspection list can keep the evaluation focused:
Look for cracks that continue across several bricks or joints.
Check for brick faces that are swelling, flaking, or missing.
Press gently on questionable mortar to identify loose areas.
Note damp staining, moss, salt deposits, or recurring discoloration.
These observations do not diagnose the cause by themselves, but they help determine whether preparation can begin or whether repair should come first. Photographing problem areas also makes changes easier to track.
Understanding the age and condition of the mortar
Mortar is not merely a filler between bricks; it accommodates some movement and helps shed water. Older walls may contain softer mortar paired with softer brick, while newer repairs may use a harder mix that behaves differently. If the joints are recessed, powdery, cracked, or missing, painting over them will not restore their function.
The repair material should be compatible with the existing masonry. A hard, poorly matched repair can place stress on brick edges and create a new failure pattern, particularly in older construction.
Identifying previous coatings and contamination
Determine whether the wall has been painted, sealed, whitewashed, or treated with another product. Peeling edges, glossy patches, color variation, and unusual surface texture can indicate earlier work. Dirt, grease, soot, biological growth, and salts can also interfere with adhesion.
A coating sample or small test area can show whether the surface responds safely to cleaning and whether the proposed primer bonds properly. Avoid assuming that a wall is ready because it appears dry on one mild day; moisture conditions can change behind the surface.
Knowing when to schedule Masonry Repair Services Minnesota
If inspection reveals loose brick, open joints, meaningful cracking, spalling, or persistent dampness, schedule Masonry Repair Services Minnesota before discussing paint as the main solution. Repair may involve more than the visible spot, particularly when water has been entering for some time. The goal is to stabilize the masonry and correct the cause before covering it.
This is also the stage to evaluate a Brick Masonry Fireplace Minnesota if the proposed work includes a Fireplace or Chimney Area. Heat exposure, soot, flashing, and crown details can make those surfaces different from an ordinary wall.
How to prepare and paint brick correctly
Preparation usually determines whether a painted brick project ages gracefully or begins failing within a short time. The surface should be cleaned with care, repairs should be allowed to cure, and the coating system should be chosen for masonry rather than for generic interior or exterior use. Weather conditions matter throughout the process. Rushing any of these steps can lock problems beneath the finish.
Cleaning the surface without damaging the masonry
Remove loose dirt, dust, biological growth, and failing paint with the least aggressive method that works. A soft brush and controlled low-pressure washing may be appropriate in some situations, while harsh pressure can drive water into joints or erode a fragile brick face. Allow the wall to dry thoroughly after cleaning, and give special attention to shaded areas.
Soot and grease may need a compatible cleaner, but every cleaning product should be tested in a small area first. The aim is a clean, sound surface, not a stripped or roughened one.
Repairing joints before applying a coating
Open or failing mortar joints should be repaired before priming. Depending on the wall, this may involve removing deteriorated material to a sound depth, installing compatible mortar, and allowing the work to cure according to the material and weather conditions. Cracked or spalled bricks may need replacement or localized repair as well.
Painting can make repaired areas less noticeable, but it should not be used to hide uneven joints or active movement. The wall needs to be stable before the finish is applied.
Choosing masonry-specific primers and breathable paints
Select products labeled for brick or masonry and review their vapor permeability, adhesion requirements, and recommended substrates. A primer may help create a consistent base, especially where porosity varies, but the primer and finish need to be compatible with each other and with the wall. Breathability is particularly relevant for exterior brick exposed to recurring wetting.
Ask how the product should be used on older or softer masonry rather than relying only on color charts. The most attractive finish is still a poor choice if it cannot tolerate the wall’s moisture conditions.
Applying the right number of coats and allowing proper curing time
Apply thin, even coats at the coverage rate specified for the product and surface. Too much material in one pass can slow drying and create an uneven film, while too little may leave porous areas insufficiently covered. Keep the work within the manufacturer’s temperature and humidity range, and protect the wall from rain or freezing during curing.
Do not judge the final result too quickly. Color and sheen can settle as the coating cures, and premature exposure to moisture may affect adhesion. A patient schedule is usually less expensive than correcting a rushed finish.
Long-term maintenance for painted brick
Painted brick requires an Ongoing Maintenance Routine, not just a one-time application. The coating should be checked for changes, while the masonry beneath it still needs attention. Small failures are easier to manage when they are found before water can travel into joints or behind the paint. Keep the product name, color, batch information, and application date with the property records.
Inspecting for peeling, cracking, and moisture intrusion
Inspect the wall at least seasonally and after severe weather. Look for peeling, blisters, fine cracks, darkened areas, rust-colored streaks, and fresh efflorescence. Pay particular attention to horizontal ledges, window details, chimney sections, and spots where snow or rain tends to collect.
A new defect should prompt questions about drainage and masonry condition, not only about the paint. If the same location fails repeatedly, a surface touch-up is unlikely to be a durable answer.
Cleaning painted surfaces safely
Use a soft brush, mild compatible cleaner, and gentle water flow when cleaning painted brick. Start at a small, hidden area to check whether the finish changes color or sheen. Avoid aggressive pressure washing, abrasive pads, and harsh chemicals unless a professional has confirmed that the coating and masonry can tolerate them.
Cleaning should remove surface dirt without forcing water into defects. Let the wall dry afterward so that new staining or dampness is easier to identify.
Touch-up strategies and color-matching challenges
Touch-ups can be useful for small, isolated damage, but painted surfaces rarely match perfectly after years of sun, weather, and dirt. The original color may have faded, and the same product can look different when applied over a repaired area. Keep leftover paint in a sealed, labeled container and record the sheen as well as the color.
Before touching up, determine why the paint failed. Scraping and repainting a damp patch may make it look better briefly while leaving the underlying problem unchanged.
Repainting intervals and lifecycle costs
There is no universal repainting interval because exposure, coating quality, preparation, color, and masonry condition all vary. South-facing walls may weather differently from shaded elevations, and areas near sprinklers or roof runoff may need earlier attention. Budget for periodic cleaning, inspection, localized repairs, and eventual recoating rather than treating the first application as the total cost.
The lifecycle cost can be higher than expected if paint removal, repeated touch-ups, or hidden repairs become necessary. A durable decision weighs the desired appearance against that longer maintenance obligation.
When professional masonry work is the better choice
Some brick projects are primarily cosmetic, while others only appear cosmetic because the damage is subtle. Professional masonry work is the better choice when the wall has movement, water entry, widespread mortar loss, or deteriorating brick. A Qualified Assessment can also prevent an incompatible repair from creating more stress. The question is not whether paint is attractive; it is whether the masonry is ready to support it.
Signs that painting should be postponed
Postpone painting when the wall is damp, the mortar is crumbling, bricks are loose, or cracks are widening. Efflorescence that keeps returning, peeling from beneath an older coating, and staining near roof or window details also suggest that the source needs attention. Painting during unsuitable weather or before repairs have cured creates additional risk.
A pause is not a failed project. It is often the step that keeps a cosmetic improvement from becoming a concealed maintenance problem.
How Tuckpointing Services Minnesota can address failing mortar
When mortar joints are deteriorated, Tuckpointing Services Minnesota may be the more appropriate starting point than painting. Tuckpointing generally focuses on removing failing mortar and replacing it with suitable new material, helping restore the joints’ role in supporting and protecting the masonry. The exact repair approach depends on wall age, mortar composition, depth of deterioration, and the surrounding brick.
The joint repair should be evaluated on its own merits before a coating is selected. Covering failed mortar does not make the joint sound, and a fresh color cannot compensate for water entering through open gaps.
Repairing water entry before cosmetic improvements
Water may enter through cracked mortar, failed flashing, porous chimney details, roof edges, window openings, or grading problems. Finding the entry point can require looking above and behind the most obvious stain. Until the source is corrected, new paint may blister or peel and the masonry may continue to deteriorate.
A useful repair sequence is straightforward:
Trace likely water paths above and around the affected area.
Repair open joints, cracks, flashing, or damaged masonry.
Allow the wall and repair materials to dry and cure.
Reassess moisture before choosing a finish.
This sequence protects the cosmetic work from being asked to solve a drainage or structural problem. It also makes later paint performance easier to judge.
Evaluating repair, limewashing, whitewashing, and painting options
Painting is only one way to change the appearance of brick. Limewashing can create a softer, varied finish, while whitewashing offers a lighter traditional effect; repair alone may be the best choice when the existing brick already suits the property. Each option changes maintenance, texture, color variation, and moisture behavior differently.
For broader restoration questions, masonry restoration guidance can provide another general point of comparison when considering the condition and longevity of brick and stone work. The final choice should follow the wall’s needs, the desired appearance, and the owner’s willingness to maintain the finish.
Conclusion
Painting brick can be a thoughtful update when the masonry is sound, dry, properly prepared, and coated with a compatible product. It can also create long-term trouble when it conceals damage or restricts drying. Inspect the wall first, correct mortar and water problems, compare finish options, and plan for continuing maintenance before committing to a color.
Frequently Asked Questions
Can all brick be painted?
No. Brick that is damp, spalling, loose, heavily contaminated, or paired with failing mortar should be repaired and evaluated before painting. Soft or historic masonry may also require a more breathable treatment.
Is painted brick difficult to maintain?
It can require more maintenance than bare brick because the finish needs inspection, safe cleaning, touch-ups, and eventual recoating. The workload depends on exposure, preparation, coating quality, and moisture conditions.
Does painting brick stop water from entering?
Paint may provide limited resistance to surface wetting, but it does not correct failed flashing, open mortar joints, roof problems, or cracks. Water-entry sources should be repaired separately.
Can paint be removed from brick later?
Sometimes, but removal can be difficult and expensive. Aggressive methods may damage the brick face or mortar, so testing and careful, compatible techniques are important.
Should mortar be repaired before painting?
Yes. Loose, cracked, or missing mortar should be addressed first. Paint cannot restore the function of a deteriorated joint and may make future inspection more difficult.
Is limewashing safer than painting brick?
Not automatically, but limewash is often considered when a softer, more breathable, and naturally varied finish is desired. Suitability still depends on the masonry, climate, and preparation.
How often should painted brick be inspected?
Inspect it at least seasonally and after severe weather. Look for peeling, cracking, staining, efflorescence, dampness, and changes around joints, windows, roof edges, and chimneys.
