
Brick Spalling: Cause, Repair, and Prevention for Masonry Structures
If you’ve ever noticed bricks on your home or building starting to flake, chip, or crumble, you’re probably dealing with brick spalling. It’s a pretty common problem in Minnesota, especially with all the freeze-thaw cycles we get. Spalling can make your masonry look rough and, if ignored, it could even mess with the structure’s strength. Whether you’re a homeowner or property manager, understanding what causes this, how to spot it, and what to do about it can save you a lot of trouble. Here’s what you need to know about brick spalling, repairs, and how Minnesota Masonry Contractors can help with Block And Brick Installation or full and thin stone veneers in Minnesota.
Key Takeaways
Brick spalling happens when bricks start to break apart, usually because of moisture and freeze-thaw cycles.
Common signs include flaking, chipping, or crumbling bricks, especially near windows, doors, and the base of walls.
Repairs can range from replacing individual bricks to bigger fixes like installing new block and brick or stone veneers.
Preventing spalling is all about keeping water out—think good drainage, regular inspections, and using breathable sealants.
Choosing experienced Minnesota Masonry Contractors means your repairs and installations, like full and thin stone veneers, will last longer and look better.
Understanding Brick Spalling in Masonry Structures
Brick spalling happens when the outer layers of bricks start to flake, crumble, or break off. It's more than just an eyesore—it can put the stability of a wall at risk if ignored. The issue develops because bricks, while tough, are still a bit like sponges. They soak up water from rain, snow, or even wet soil. When temperatures swing back and forth, as they do in Minnesota, all that moisture inside the brick expands and contracts.
This cycle of freezing and thawing is a big reason spalling starts in the first place. Over time, small cracks appear, and those cracks just keep spreading. Think about places on your house that are often wet—near windows, at the bottom of walls, or close to downspouts. Those bricks are most at risk. If there’s rusting metal inside the wall, like a lintel, the pressure from expanding metal can really push out and crack the surrounding bricks, which is discussed in the context of rusting metal lintels and brick damage.
Here’s what usually sets the stage for brick spalling:
Repeated freeze-thaw cycles that expand little pockets of water.
Water intrusion from poor drainage or leaky gutters.
Using the wrong type of mortar, which locks in moisture or doesn't move with the brick.
Non-breathable sealants trapping moisture inside the wall.
Accidental damage from things like high-pressure washing.
Even though bricks look super solid, underneath that surface they're constantly pulling in and pushing out moisture. Spalling is what happens when that natural process gets out of balance and the brick just can't handle it anymore.
Understanding what causes brick spalling and where it usually shows up is the first step to keeping your masonry looking good and safe for the long run.
What Causes Brick Spalling?
Brick spalling usually starts with water getting into the brickwork, but it's not always that simple. The true trouble comes when several factors line up, turning a solid wall into a flaky, damaged mess. Let's break down what actually causes this to happen:
Repeated freeze-thaw cycles: When water soaks into brick and the temperature drops, the water freezes and expands. This puts too much pressure inside the brick, making it crack or the surface pop off. Think of it like forgetting your soda in the freezer–only it's your wall.
Poor drainage: If gutters, downspouts, or ground slope direct water toward your brick, it's basically giving moisture a free ticket inside. Wet bricks stay wet longer, making them vulnerable.
Wrong mortar or hard repairs: Sometimes repairs are done with mortar that's too hard or incompatible. Incorrect mortar can keep bricks from moving naturally, forcing them to bear stress and eventually crumble at the surface.
Non-breathable coatings or paints: Paint and some sealants might seem protective, but if they trap water inside the brick, the moisture has nowhere to go. Trapped water is a recipe for disaster in cold climates.
Aggressive cleaning techniques: Power washers or harsh chemicals don't just remove dirt—they can blast away the protective surface layer of brick, exposing it to more damage.
Sometimes, you can't even see exactly where the water's getting in or which problem started first. That's what makes spalling so tricky—multiple issues gang up on your brickwork over time.
Understanding these causes is the first step to stopping spalling from getting worse. Each problem has a solution, but the first move is to figure out which mix of culprits is at play in your building.
Identifying Signs of Brick Spalling
Spotting brick spalling early can save you from a bigger headache down the road. The biggest clue is often when you notice your bricks or mortar looking crumbly, flaky, or even peeling away. Sometimes, just running your finger over a wall is enough to find brick that powders right off. This isn’t just about looks; damaged brick can mean water is seeping in and breaking things down from the inside out.
Here's a quick rundown of what to look for:
Flaking or peeling brick surfaces (like the brick is shedding its top layer)
Chipping and cracks in individual bricks or between mortar joints
Loose or crumbling bricks, especially near windows, doors, or the foundation
Larger chunks or layers of brick face falling off
White, powdery deposits (efflorescence), a sign trapped moisture is at work
Bulging or bowing in any part of the brick wall
Step-shaped or jagged cracks moving through both the brick and mortar
If your masonry shows more than one of these issues, spalling is likely the culprit. According to common insights on structural damage indicators, bulging walls, step cracks, or loose brick are troublesome signs that should make you pause.
Addressing these warning signs as soon as possible helps keep small issues from turning into major repairs, and protects the overall safety of your masonry structure.
Repair Solutions for Spalled Brick
Brick spalling can seem overwhelming, but with the right approach, you can restore both the look and the strength of your masonry. Let's walk through what works when you’re dealing with spalled brick and when you might need to call in professional help.
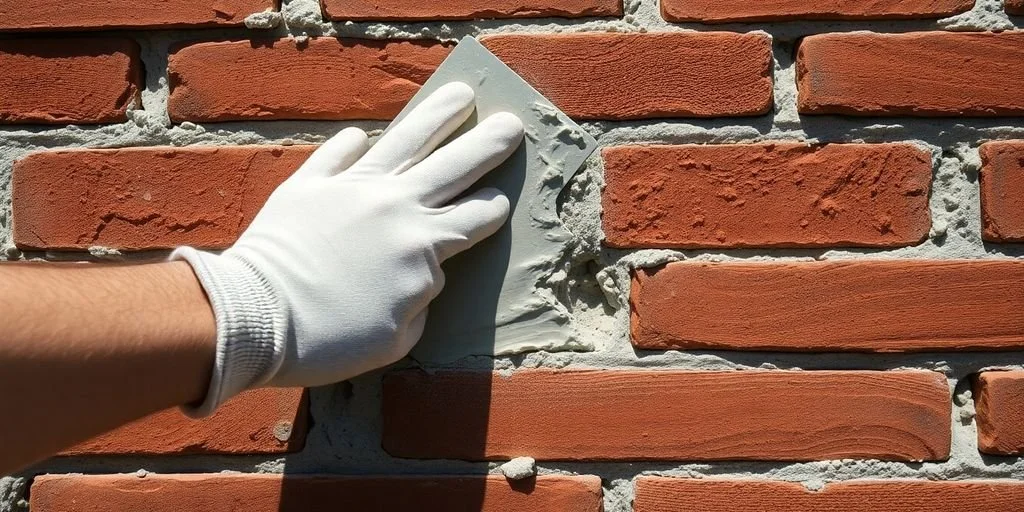
Block and Brick Replacement Procedures
Replacing heavily damaged bricks is often the only way to really fix spalling issues. Here’s a clear rundown of how that’s usually done:
Examine the area to figure out which bricks are affected and how far the damage reaches. Use a light tap to identify hollow or crumbling sections.
With tools like a chisel, hammer, or a masonry cutting wheel, carefully remove the broken bricks and any crumbling mortar (you might find some helpful guidance here: carefully remove the damaged bricks).
Clean out dust and old mortar from the gap—don’t skip this part, or the new mortar won’t stick well.
Mix fresh mortar, making sure it matches your existing brickwork in color and texture.
Place the new brick into the opening and fill all the joints with mortar, smoothing them to match the rest of your wall.
Allow the new mortar to cure fully, which can take several days.
Sometimes, the other sides of a spalled brick are still good, so professionals will just turn the brick around rather than replace it completely.
Full and Thin Stone Veneer Repairs
For masonry surfaces with Full And Thin Stone Veneer, repairs can be a bit different than standard brick replacement. Here are the typical steps:
Remove any loose or cracked stone pieces and clean the area thoroughly.
If using full stone veneer, new stones are set into a fresh bed of mortar, making sure to line up with the surrounding pattern.
Thin stone veneer repairs often involve applying an adhesive or thinset, then snugly fitting the replacement stone onto the wall.
Let the repair dry without rushing it—patience pays off here.
In my own experience, waiting for mortar to cure feels endless but skipping that step or getting impatient just leads to more problems down the road. Take your time to do it right, even if it’s tempting to rush.
Before you start any kind of repair, make sure you’ve figured out what caused the spalling. If it’s a water problem, fixing it at the source is the only way your repairs will last.
Preventing Brick Spalling in Masonry Structures
Taking steps now can help you avoid the headache (and expense) of spalled bricks showing up later. Brick spalling is mostly a water problem—if you keep moisture out, you reduce the risk a lot. Here’s what you can actually do around your home or building:
Use a breathable masonry sealant, not a paint or coating that traps moisture. That means water can get out if it does sneak in, instead of turning into ice and causing cracks.
Check gutters, downspouts, and any ground drainage. Make sure water goes away from your brick, not toward it. Fix leaks or blockages as soon as you notice them, especially after storms or snowmelt.
Inspect for tiny cracks or missing mortar once or twice each year. It might sound boring, but finding issues early means way cheaper fixes.
Install chimney caps and flashing where appropriate, especially if you live where winters are harsh. Don’t skip this if you have an older home.
Trim plants and vines that touch your masonry. They seem harmless but can trap moisture right up against your brick.
The big thing I learned when fixing up my uncle’s house: regular, simple checks really do pay off. Spalling doesn’t happen overnight, but ignoring moisture can turn a small brick crack into a huge project.
Keeping up with this stuff isn’t glamorous, but it’s so much easier than a full masonry repair down the road. Just a little attention, and your brickwork will last way longer.
Choosing the Right Minnesota Masonry Contractor
Finding someone to work on your brickwork is a lot like getting a mechanic for your car; you want someone who gets it right the first time and doesn't leave you worried about follow-up repairs. Choosing a Minnesota masonry contractor for brick spalling repairs means looking for more than just a handy person with tools—you need a crew that understands brick, mortar, and how to handle unpredictable Midwest weather. Honestly, here's how I'd go about it:
Check experience with local brick types and Minnesota's unique freeze-thaw cycles.
Read real customer reviews to see how they've handled jobs big and small (sites like Angi for local masons are helpful).
Ask about their process: do they inspect, diagnose the root cause, and offer prevention tips, or just slap on new bricks and walk away?
Not every contractor is the same—ask questions about how they select and match replacement bricks, what kind of mortar they use, and if they know how to keep moisture from getting trapped in the wall. If they can't answer clearly, keep shopping.
Conclusion
Brick spalling can feel like a headache, especially when you first spot those crumbling or flaking bricks on your home or building. The good news is, it’s not the end of the world. Most of the time, spalling comes down to water sneaking in where it shouldn’t, freeze-thaw cycles, or sometimes just old age and a bit of neglect. If you catch it early, repairs are usually pretty straightforward—sometimes it’s as simple as swapping out a few bricks and fixing up the mortar. But, if you let it go, the damage can spread and get a lot more expensive to fix. The best way to keep your brickwork looking good is to check it regularly, keep water away from the foundation, and use the right materials when you do repairs. And if you’re ever unsure, don’t be afraid to call in a pro. Taking care of spalling now means you’ll have strong, good-looking brickwork for years to come.